What you'll need
- You’ll need a secure file transfer client to upload your web pages and associated resources. Most CDU computer laboratories have the SSH Secure File Transfer client installed.
- By using Secure Shell (SSH) encryption a user can log into a server and all the uploaded data will be tunnelled through an encrypted session. If someone tries to intercept your upload they will encounter encrypted data.
- When uploading from outside CDU then you’ll need a SSH client installed on your computer. A good free client is Winscp from http://winscp.net/eng/index.php. Get the download from http://winscp.net/eng/download.php
- Before you start uploading you’ll need the following information:
| Host name | nutmeg.cdu.edu.au |
|---|---|
| Port number | 22 |
| User name | Your User name will be your student nuber prefixed with a lower-case letter 's' |
| Password | The Password will be issued to you in the first week of the course. (Please don't share your password) |
Start file sharing client
- Start the SSH Secure Shell (Secure File Transfer Client). You will typically find it in the Programs, Applications branch of the Start menu

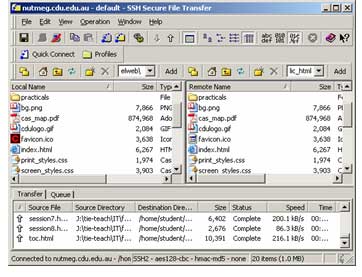
- After the SSH client starts you should see something like this (without the red oval shapes):
- The list of files and directories (folders) you see under in the Local Name panel are those on your local computer. Navigate to the directory which contains the files you wish to upload.
- The adjacent panel under Remote Name remains blank until you after you connect to the server.
Connect to remote host
Now we need to connect to the remote server.
- Click the Quick Connect button
- After you choose Quick Connect you should see the Connect to Remote Host dialog.

- The only details required here are the Host Name and the User Name. The Port Number of 22, is already inserted by default
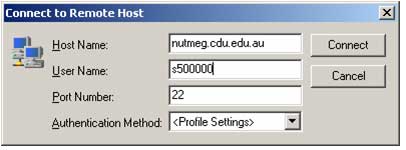
- Click Connect
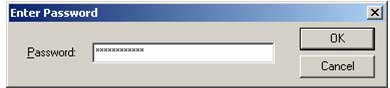
- Now type your Passoword and click OK
- If all the details are correct, then you will connect to the server. Note that you can now see a directory called public_html in the Remote Name panel.

- Double-click the public_html directory i.e go into this directory.
- This is the root of your web site, and the place to which you will upload.
Transfer files
- Select the files and directories in the left-hand panel i.e the Local Name panel. Use Ctrl-A to select all or just select the individual files you want to copy over
![]()
- Copy and paste, or just drag the selection to the Remote Name panel, and the uploading will begin.
- You will probably want to copy everything over to the web server the first time. As you make changes to the web site you will probably only copy over newly created or modified files.
- Always keep the original files on your local machine. Always edit files on your local machine and then copy them over. That way you will at least have a backup if the server copy is destroyed.
Create URL
Now that you have your website on the web server, you can test it by typing in the appropriate URL.
- You should be able to access your website with the URL:
http://nutmeg.cdu.edu.au/students/s500000/
insert your student number where you see s500000 - You may need to write the actual filename at the end of the URL. For example: http://nutmeg.cdu.edu.au/students/s500000/myhome.html
- The web server will look for the file named index.html if you omit the filename from the URL.
The example shown here retrieves a file called index.html

- If you have successfully copied your files to the web server, and the URL does not work, then please check the accuracy of the URL first.
- Keep case-sensitivity issues in mind.
- Contact your lecturer if you still can’t get it to work.
- Finally, note that your pages are effectively on the Internet and anyone typing in your URL will locate it.